

Effective September 1, 2023, Dynamics 365 Marketing and Dynamics 365 Customer Insights will combine into Dynamics 365 Customer Insights. They will be referred to as Dynamics 365 Customer Insights – Journeys and Dynamics 365 Customer Insights – Data. Check Dynamics 365 Customer Insights FAQs for details.
Welcome to the first installment of my series all about Events in real-time marketing! In this edition, we are taking the plunge into the world of getting started. I’ll guide you through activating the feature, crafting an event, and whipping up a snazzy form. Stick around for the ride! 🎉
Getting things done in real-time marketing, especially in the context of events, hasn’t exactly been a walk in the park. Well, at least not until now. I was genuinely thrilled to stumble upon Megan Walker’s blog post. She spilled the beans on setting up a Power Pages event portal instead of the run-of-the-mill out-of-the-box option. In her post, Megan showed the newfound ability to tackle events in real time. Exciting stuff🥳!
Activate the “Events creation in real-time marketing” feature.
First, we need to activate a new feature, ”Enable events creation in real-time marketing” , under settings and Feature Switches.
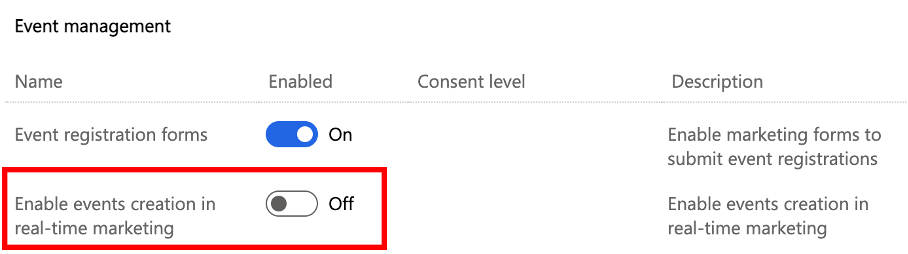
What this will do is give us a new option when we create an Event.
What´s the difference
The most significant difference here from the “traditional” events is the fresh set of options available under the “Website and form” tab. This is where the excitement kicks in—now we have the option of using real-time marketing forms for event registration. How awesome is that? 🥳 These forms are super flexible; they’re dynamic, which means you can easily reuse them as templates. What’s even cooler is that they allow for dynamic text and information retrieval directly from the event record.
Imagine this: you can customize the Event record with new fields to input information that’ll pop up in the Event registration form. Think of it more as a landing page than just a plain form. This level of customization is a game-changer!
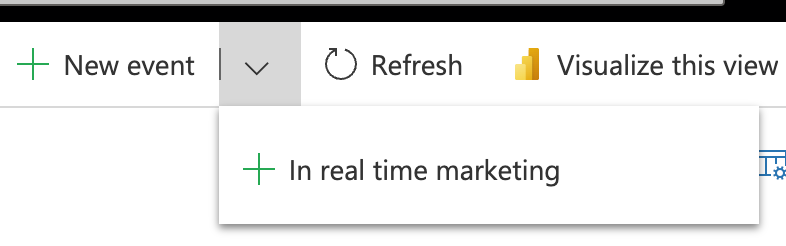
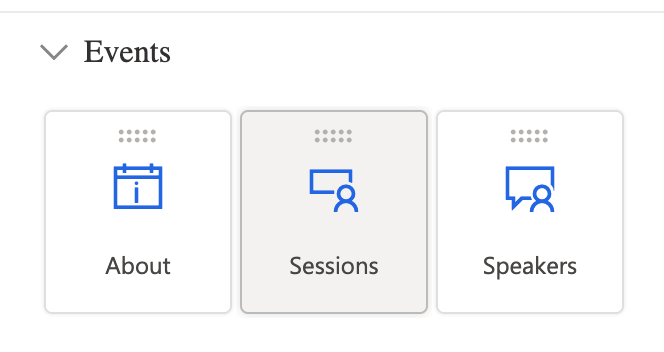
Create the Event
Ready for action? Let’s roll! First, give that down arrow to the right of “New event” a nudge, and then tap “In real-time marketing.”
Now, the fun part: slap a name on it and pour in all the juicy details for your event.
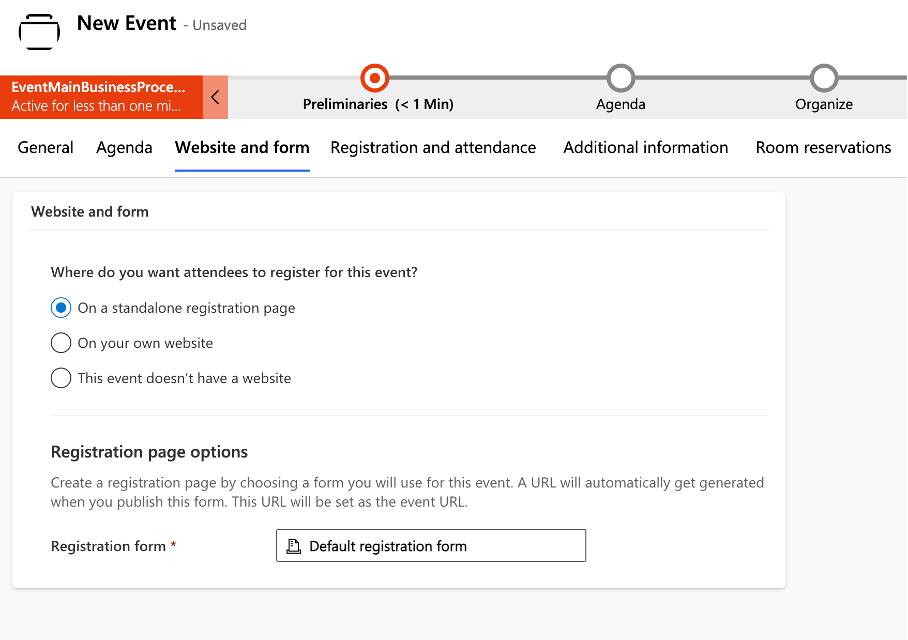
Next pit stop: head over to the “Website and form” tab. Let’s keep the momentum going! 🚀
Alright, buckle up for the registration ride! Here, you’re faced with three enticing options for event registration:
- On a standalone registration page:
- This is the no-fuss option. It automatically crafts a hosting page for your form. No portal installation needed. Voila! The link for this page pops up like magic.
- On your own website:
- Feeling the DIY vibe? Here’s the deal: you provide a link to the event page, and in return, you snag a neat JavaScript code. That code lets you embed the form right on your website. A tech-savvy two-step!
- This event doesn’t have a website:
- Sometimes simplicity rocks. Pick this if you’re steering clear of a registration form altogether. You’ve got your own secret sauce for handling registration elsewhere.
Time to pick your registration adventure! 🚀
Event registration form
By default, the “Default registration form” comes pre-added to the event. Once you click on it, customization is just a click away with the “Edit” button. You’ll then face a choice: either tweak the default directly or make a duplicate to work on. If you choose to edit the default, remember that whatever changes you make will be reflected across all events using that form. It’s pretty slick, right?
I’m a fan of standardizing things to make life easier—less need for constant reinvention. So, my suggestion? Set up forms that tick all the boxes for your event needs and save yourself some precious time. Because let’s be real, we all have better things to do than create custom forms for each and every event. 😉
Once you step into the form editor, a sense of familiarity might wash over you, as it bears a resemblance to other sections of the system. Positioned on the right is your trusty toolbox, stocked with various elements up for grabs. You can throw in images, type out text, and even throw in those all-important captchas to keep those pesky bots at bay. No bot invasion allowed, I promise! 😄
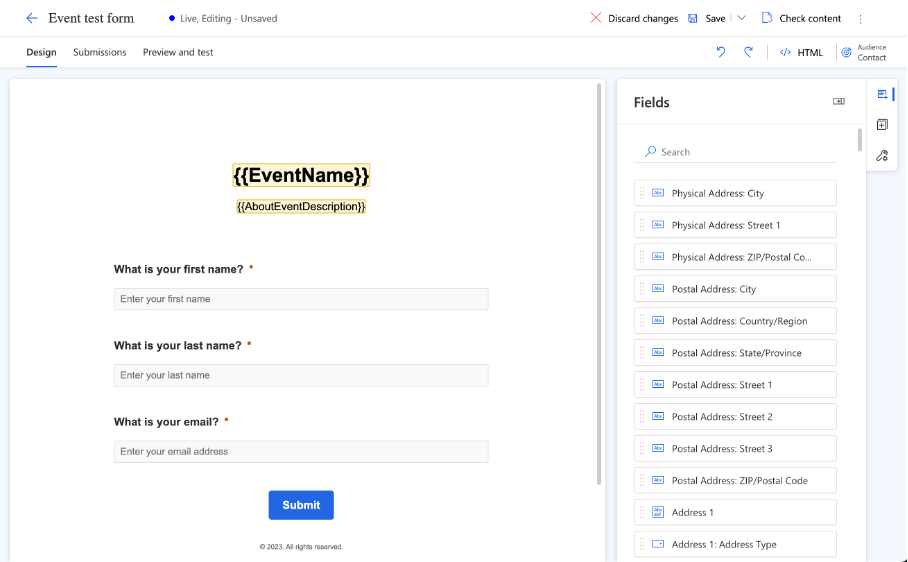
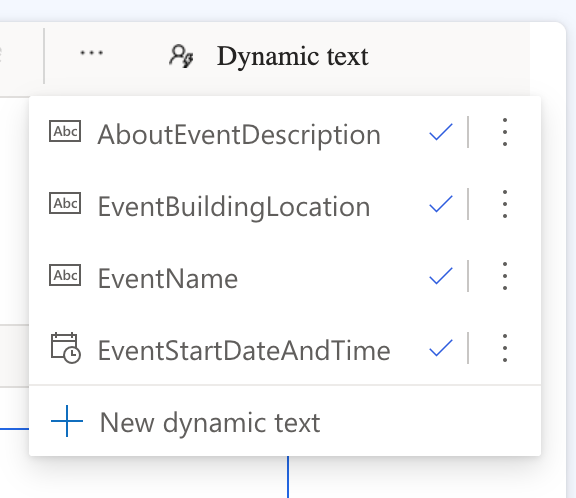
There’s another section in the mix where you can effortlessly slot in event information. This part uses dynamic text, powered by liquid tags. While there are a few default ones to get you started, feel free to toss in as many as your heart desires. It’s all about customization! 🌟
To add more dynamics text just put your curser in a text box and then press “Dynamic text” followed by “New dynamic text”.
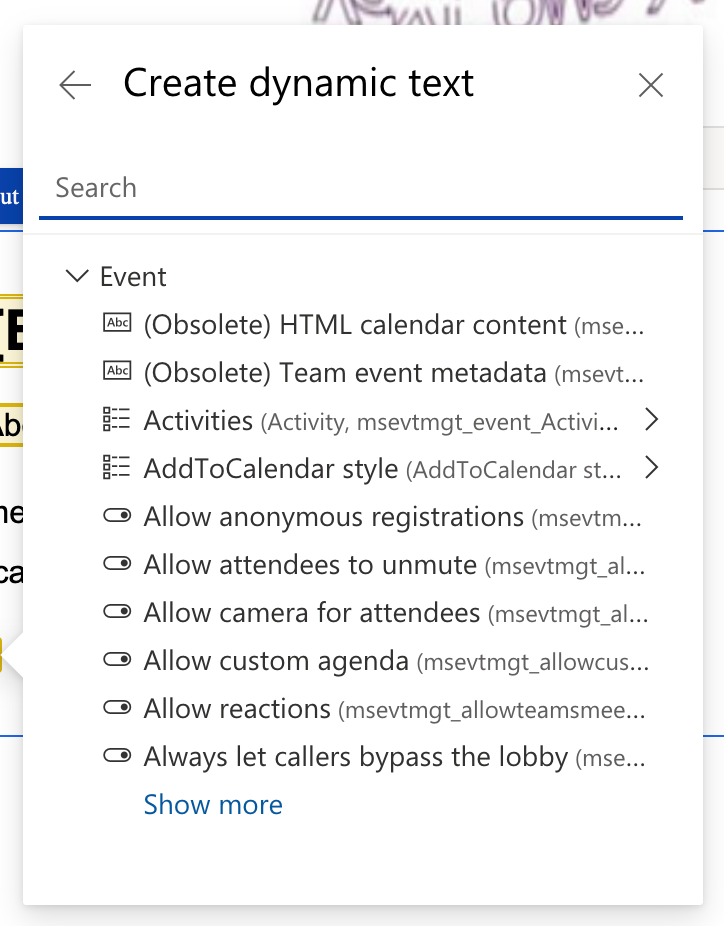
Press choose an attribute
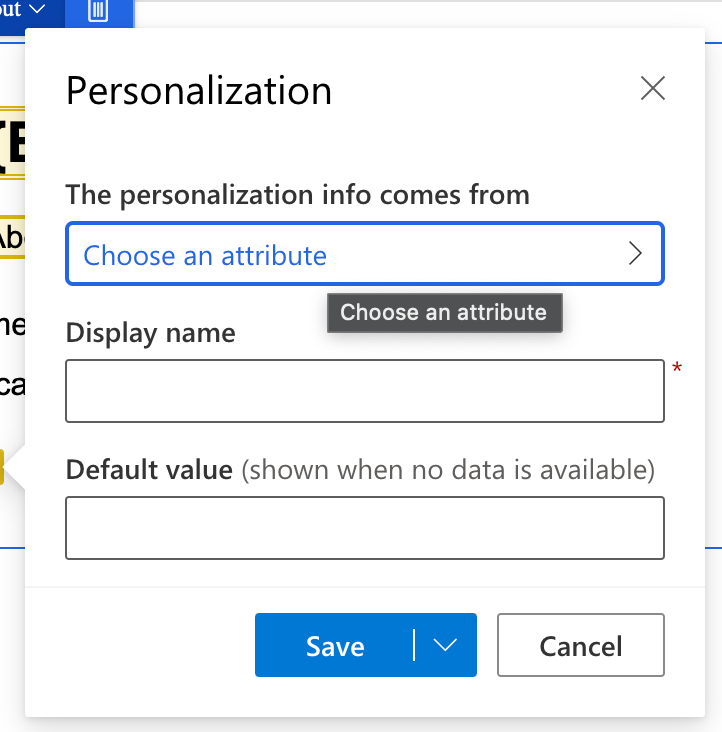
Time to embark on a little scavenger hunt! Look around for that field you’re itching to add. It might be hanging out on the event record, or perhaps kicking back in a related table. Take “Building information,” for instance – that’s a prime candidate!
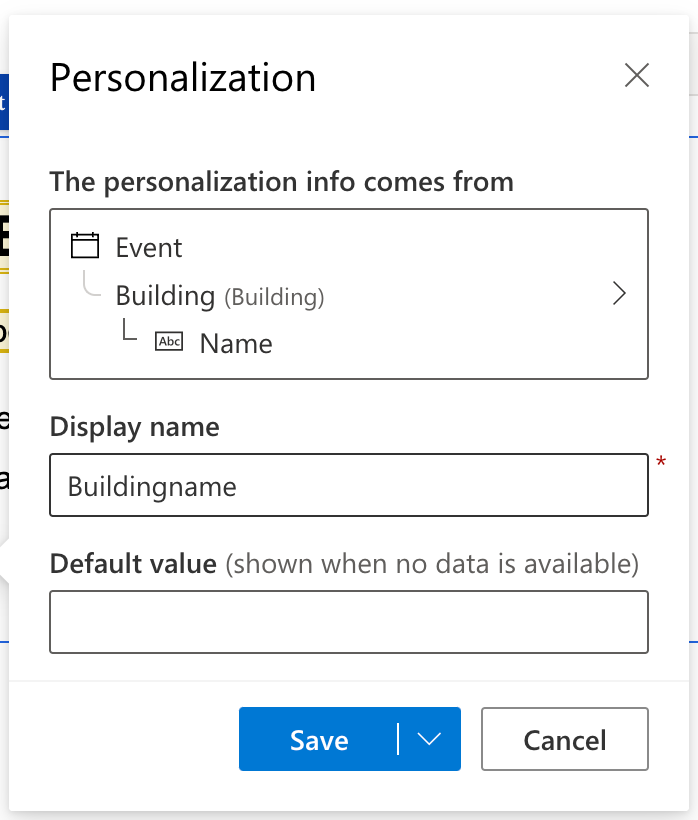
Go ahead and include all the information you want to show on the form. And while you’re at it, jot down the fields you’d like to introduce to the event record. This way, they can work their magic and dynamically appear on the form whenever you decide to use them in the future. Keep those options open! 🌈
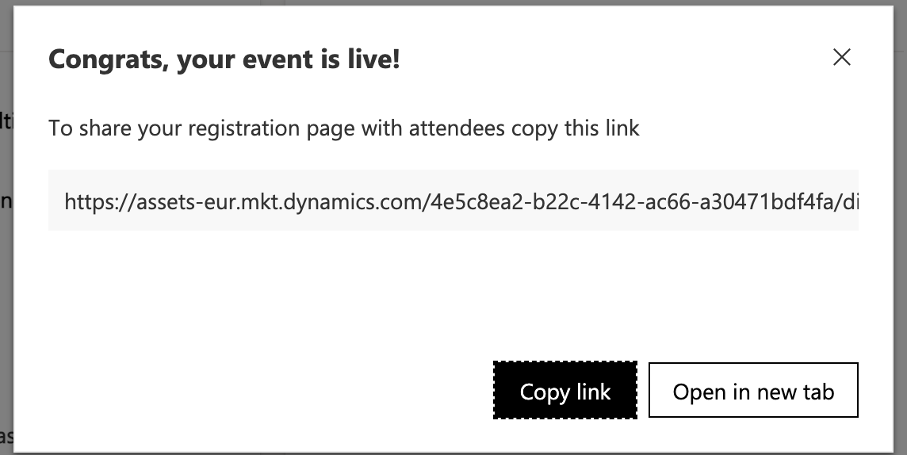
Then, when you’re content with your masterpiece or simply can’t summon the energy for any more edits, go ahead and hit that “Save and Publish” button. It’s the ultimate seal of approval, whether you’re riding the wave of satisfaction or riding the “no more edits” vibe. 🎉
Once you’ve proudly hit “Save and Publish” for your form, get ready for a little popup action. If you opt to host it on a standalone page, the message might go something like this:
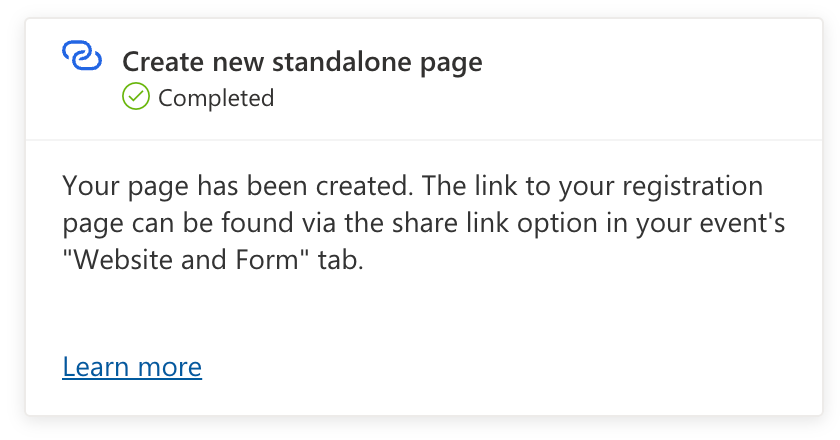
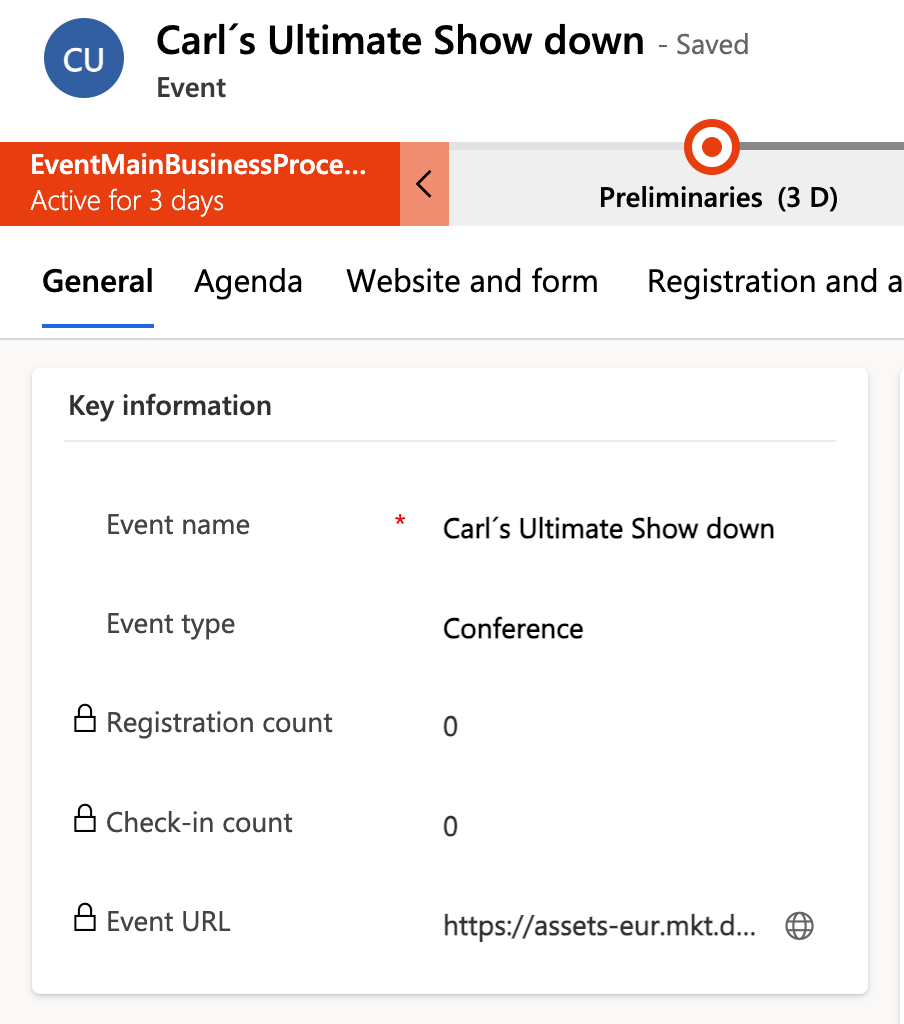
Hold on a sec, because the info in this popup needs a correction. The right sequence goes like this: before you can grab the link, make sure you publish the event first. Once that’s done, your treasure trove of a link can be discovered under the “General” tab named “Event URL”. Oh, and here’s the kicker: you’ll even get a friendly popup with the link when the event is officially published. Keep those steps in check! 🌟
And with that, we’ve reached the end of our expedition into setting up events and registration forms within the realm of real-time marketing. Your company on this journey has been much appreciated. Keep an eye out for our next escapade, where we’ll delve into the realm of setting up journeys for sending invitations, reminders, and confirmations. Until we meet again! 🌟
Acknowledgments
I’d like to extend a special thank you to Megan Walker, Carina Claesson, and Emma Cholodov for their invaluable feedback and assistance in crafting my inaugural post. Your support is immensely appreciated❤️.
Leave a Reply